Need Waterproofing Help? Call: (860) 875-6646
If you're noticing signs of moisture in your walls, it's important to address the issue early to avoid structural damage or mold growth. This guide walks you through each step, from identifying the source to repairing the leak and preventing future problems. Whether you're handling minor water issues or suspect something more serious, this overview will help you understand when it’s time to call a trusted waterproofing service in South Windsor, CT.
To identify where the water is entering, start by inspecting any areas that appear damp or discolored. Common indicators include paint that’s peeling, wallpaper that’s bubbling, or faint stains spreading across the surface. Feel the wall for softness or unusual temperature changes. If you suspect water is coming from above, check ceilings and nearby plumbing.
In some cases, moisture can travel along beams or pipes, appearing far from its source. Use a flashlight to examine low-light corners, and don’t overlook areas behind furniture or under windows. A careful and wide-ranging inspection will help determine the origin of the leak and inform your next steps.
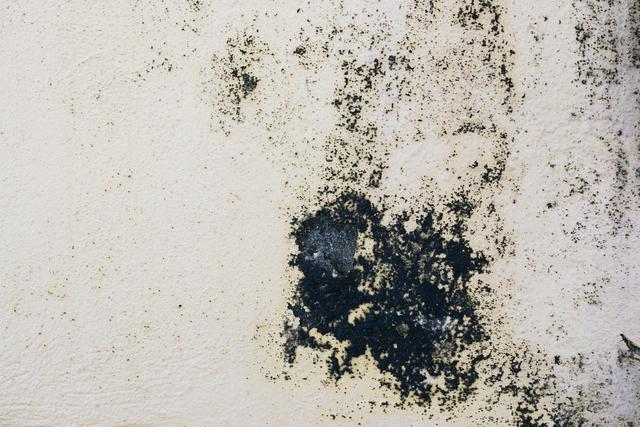
Once the leak source is narrowed down, take time to evaluate how much damage has occurred. Discoloration and warping are surface-level issues, but soft drywall or a persistent musty smell might point to more serious problems. Look behind baseboards, near outlets, and inside closets for less obvious signs.
Gently pressing with a screwdriver can help reveal hidden rot or deterioration. Small leaks that have been caught early may only require patching and drying. However, if there's widespread staining, visible mold, or signs of structural weakness, a more involved repair, or professional assessment, may be necessary to fully restore the space.
After confirming the leak’s location, especially for basement wall leak repair in South Windsor CT, begin by removing all affected materials. Cut away wet or damaged drywall and insulation using a sharp utility knife, making sure the area is cleared back to dry, stable material. Allow the area to fully dry using fans or a dehumidifier before applying any sealant.
When dry, apply a waterproof sealant directly over the point of entry, following application directions carefully. Once sealed and cured, rebuild the wall with fresh drywall and insulation, then tape, sand, and finish to match the existing wall. This process not only repairs the issue but also helps strengthen the area against future leaks.
For deeper crack repair needs, especially when water intrusion is coming through foundation fractures, epoxy injection crack repair in South Windsor CT can provide a long-lasting structural seal.
Drying the area thoroughly is a key part of the repair process. Place fans so they direct airflow across the damp surface, promoting faster evaporation. A dehumidifier can be helpful in maintaining low humidity and drawing moisture from the air.
If the weather permits, opening windows may also help ventilate the space. Monitor moisture levels over several hours or days, rushing this step can lead to mold problems down the line.
Do not begin replacing materials until you're confident that all affected areas are completely dry, inside and out. Taking time here prevents future issues and improves the long-term results of your repair.
Once the immediate problem is solved, it’s worth making a few adjustments to protect against future water issues. Begin by checking all nearby plumbing for signs of corrosion, drips, or worn-out fittings. Replace anything that appears old or damaged. Maintaining consistent water pressure and insulating pipes in colder seasons can also reduce the risk of unexpected leaks.
In areas where leaks are more likely, such as basements or laundry rooms, consider installing early warning moisture alarms. Regular visual inspections, especially after storms or cold snaps, will help you catch small issues before they become larger repairs.
Even after a successful repair, keep checking the area for any signs of mold. It can develop quickly after water exposure and may remain hidden in porous materials. Watch for persistent musty smells, dark spots forming on walls or ceilings, or allergic reactions when spending time in the room.
Use a flashlight to check less obvious areas, behind furniture, under carpets, or in nearby closets. If mold does appear, don’t delay; prompt treatment reduces health risks and prevents it from spreading further. For larger growths or recurring problems, professional remediation is often the safest and most effective approach.
Related Topics: