Repairing cracks in a basement wall is a step-by-step process that benefits from steady preparation and careful application. This overview outlines how to evaluate the crack, select an appropriate repair method, prepare the wall, and reinforce the work to ensure it holds up well over time. These are the same principles often used by professionals who provide reliable waterproofing services, helping to ensure the repair remains intact even in damp conditions.
Assessing the Crack Severity
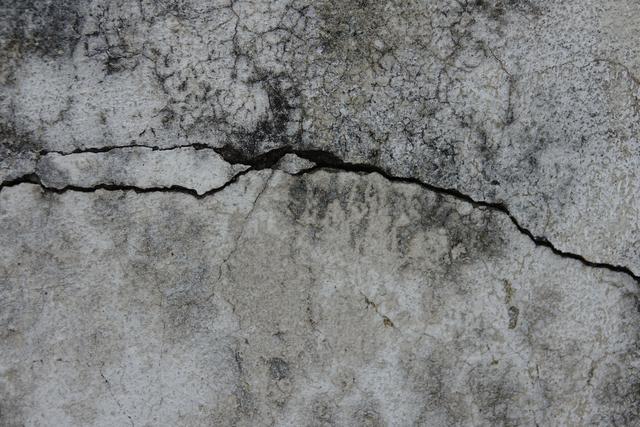
Start with a slow, detailed look at the crack. A ruler helps measure the width, and a flashlight exposes shadows or uneven surfaces. Thin lines typically form due to settling, while wider gaps may indicate stress or moisture pressure. The direction of the crack also matters. Horizontal cracks can point toward outside pressure, while vertical lines often come from normal shifting. Watch for slight displacement or water stains, as both can indicate deeper issues needing prompt attention.
Choosing the Right Repair Method
The method you pick should match the cause and the size of the crack. Epoxy is suited to structural cracks because it hardens into a strong bond. Polyurethane foam works well for cracks that let in water since it expands and fills the space tightly. Hydraulic cement fills non-structural openings and can resist moisture once it has set. Knowing how the crack formed makes it easier to choose a repair that will last, rather than a temporary fix.
Preparing the Surface for Repair
A clean surface is necessary before you apply any repair material. Brush away loose mortar or dust, then wash the area with a mild detergent solution so nothing interferes with adhesion. Rinse the wall and let it dry completely. Protect nearby surfaces with tape if you are working in a finished basement. Careful preparation helps the repair bond firmly to the wall and improves the final appearance.
Applying the Sealant or Epoxy
Once the crack is clean and dry, place the sealant or epoxy into the gap so it reaches the deepest point. Use steady pressure to fill the space completely. Smooth the surface so it blends with the surrounding wall. Follow the curing instructions, as the repair material needs time to harden correctly. This step determines how well the repair will resist moisture and shifting.
Reinforcing the Repair for Durability
Fiberglass mesh tape can strengthen the area after the sealant or epoxy sets. The mesh adds stability, helps the patch resist movement, and lowers the chance of the crack reopening. It also provides future layers of material with a firm surface to grip, which enhances the repair’s hold under varying temperatures or moisture levels.
Maintaining the Repaired Wall
Keep an eye on the repaired area from time to time. Look for new lines, damp spots, or bulging surfaces. Prompt attention prevents small problems from spreading. Keeping the wall clean and dry also helps preserve the repair. Regular checks, especially after storms or seasonal changes, support long-term stability and keep the wall in dependable shape.
Related Topics: